Attic Insulation Upgrades That Reduce Southern California Heat
Attic Insulation Upgrades That Reduce Southern California Heat
Reading time: 14 minutes
If you’ve ever walked into your Southern California home in August and felt like you’d stepped into a convection oven, you already understand the problem on a visceral level. The attic above your ceiling isn’t just a storage space for holiday decorations — it’s either your home’s greatest thermal enemy or its most powerful climate ally, depending on how well it’s insulated.
Southern California’s unique climate presents a challenge that most national insulation guides simply don’t address properly. You’re not dealing with bitter winters that demand maximum heat retention. You’re fighting radiant heat gain — intense solar radiation baking your roof deck, superheating the attic space, and steadily pushing that heat down into your living areas. In the summer of 2025, the Los Angeles Basin recorded 23 days above 100°F, straining both the power grid and household cooling budgets to breaking point. In 2026, energy consultants are projecting another record-breaking cooling season.
The good news? A strategic attic insulation upgrade can reduce your cooling load by 20 to 40 percent, cut energy bills significantly, and make your home dramatically more comfortable — without relying entirely on an HVAC system running at maximum capacity all day.
This guide will walk you through everything you need to know: the science behind Southern California heat gain, the best insulation materials and methods for the region, real-world examples, cost comparisons, and a practical roadmap for getting your upgrade done right.
Table of Contents
- Why the Attic is Southern California’s Biggest Heat Problem
- Types of Attic Insulation: What Works in SoCal
- Understanding R-Value in a Hot Climate Context
- Radiant Barriers: The SoCal Secret Weapon
- Insulation Methods Compared
- Real Homeowner Stories: Before and After
- Energy Savings by Insulation Type
- 3 Common Challenges and How to Overcome Them
- Cost Breakdown and Incentives in 2026
- Frequently Asked Questions
- Your Cool-Home Roadmap: Next Steps
Why the Attic is Southern California’s Biggest Heat Problem
Let’s talk physics for a moment — because understanding why your attic gets so brutally hot is the first step toward solving the problem intelligently. In Southern California, solar irradiance is among the highest in the continental United States. A dark asphalt shingle roof absorbs up to 90 percent of solar radiation, and on a 95°F day, that roof surface can reach temperatures of 160 to 185°F. The trapped air in an unventilated or poorly insulated attic can hit 150°F by early afternoon.
That superheated attic air doesn’t just sit there politely. Heat naturally moves toward cooler spaces. Your air-conditioned living room, at 75°F, becomes a magnet for all that thermal energy pushing through your ceiling drywall, insulation, and eventually into your home. The result: your air conditioner runs longer, works harder, wears out faster, and drives up your electricity bill every single month of the warm season — which in Southern California means roughly eight to nine months of the year.
According to the California Energy Commission’s 2025 Residential Energy Efficiency Report, heating and cooling account for approximately 47 percent of total home energy use in Southern California. Of that, a disproportionate share — nearly 35 percent — is directly attributable to thermal transfer through the attic plane. That’s a significant and highly addressable inefficiency hiding above your ceiling.
The Stack Effect and Air Sealing: Often Overlooked
Beyond direct radiant transfer, many Southern California homes also suffer from what building scientists call the stack effect — a phenomenon where hot attic air is actually drawn into the living space through gaps, bypasses, and penetrations around light fixtures, HVAC ducts, and ceiling framing. A 2024 study by the Lawrence Berkeley National Laboratory found that the average California home built before 1990 has enough air leakage to be equivalent to leaving a window open 24 hours a day.
This means that insulation alone isn’t always enough. A comprehensive attic upgrade combines proper insulation materials with strategic air sealing — particularly around recessed lighting, attic hatches, and the tops of interior walls. Skipping the air sealing step is one of the most common mistakes homeowners make, and it can reduce the effectiveness of even premium insulation by 30 percent or more.
Types of Attic Insulation: What Works in SoCal
Not all insulation products are created equal, and more importantly, not all of them are optimized for Southern California’s specific challenge: blocking heat out rather than keeping it in. Here’s a practical breakdown of the main options you’ll encounter.
Blown-In Fiberglass or Cellulose
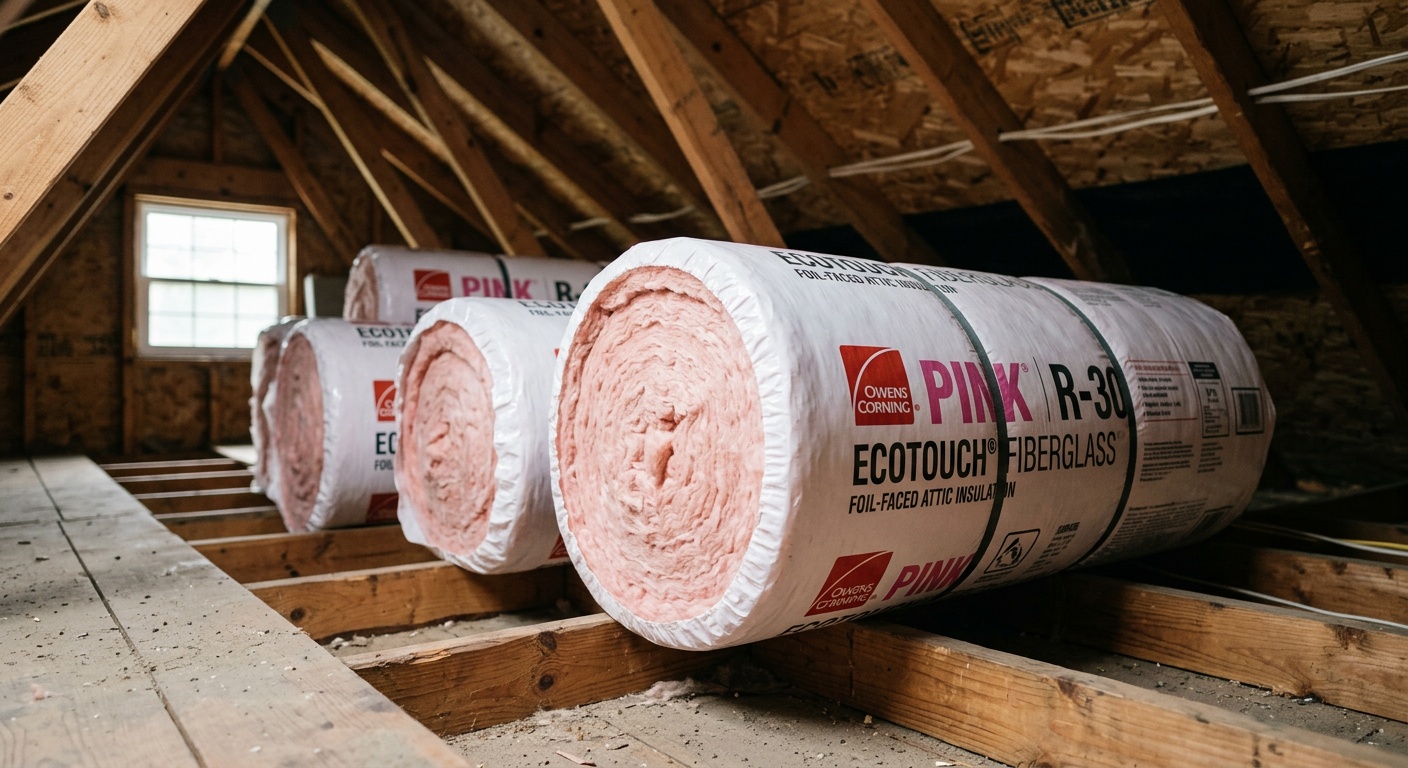
Blown-in insulation remains the most popular retrofit choice for existing Southern California homes, and for good reason. It can be installed quickly over existing insulation, conforms to irregular joist spacing, and delivers solid R-value per dollar. Blown-in cellulose (made from recycled paper treated with borate fire retardant) typically provides R-3.2 to R-3.8 per inch and has good thermal mass properties that help stabilize temperature swings. Blown-in fiberglass delivers approximately R-2.2 to R-2.7 per inch and is resistant to moisture — a consideration in coastal SoCal areas prone to marine layer humidity.
For most homes in the Los Angeles, San Diego, Riverside, and Inland Empire regions, blown-in insulation to a total depth of R-38 to R-49 on the attic floor is the current recommended standard per the 2022 California Building Code (still in force as of 2026). This typically means 12 to 15 inches of material depending on the product used.
Spray Foam Insulation
Spray polyurethane foam (SPF) is the premium choice, and it comes in two varieties: open-cell and closed-cell. For Southern California applications, closed-cell spray foam deserves special attention when applied directly to the underside of the roof deck — a technique called “hot roof” or “unvented attic” construction.
By moving the insulation plane from the attic floor to the roof deck itself, you effectively bring the attic into the home’s conditioned envelope. Your HVAC ducts, which typically run through the attic, are no longer exposed to 150°F air — which alone can account for 20 to 30 percent duct efficiency losses. Closed-cell spray foam delivers R-6 to R-7 per inch and also acts as an air and vapor barrier simultaneously. The downside? Cost. Spray foam installations run two to three times more than blown-in alternatives.
Rigid Foam Board
Rigid foam panels (polyisocyanurate, EPS, or XPS) are less common in attic retrofits but see use in specific applications — particularly when installed on the roof deck exterior during a re-roofing project, or as a thermal break above cathedral ceiling rafters. Polyiso boards deliver the highest R-value per inch (approximately R-6.5) of any rigid product and are well-suited to SoCal’s dry climate. They’re an excellent option if you’re already planning a roof replacement.
Batts and Traditional Roll Insulation
Fiberglass batts remain the DIY staple, available at any home improvement store and straightforward to install between attic floor joists. However, batts are less effective than blown-in at filling gaps and conforming to irregular spaces, and they require very precise installation to achieve their rated R-value. In practice, poorly fitted batts can perform 30 to 50 percent below their label rating. If you choose batts, proper installation technique — no compression, complete coverage, no gaps at edges — is critical.
Understanding R-Value in a Hot Climate Context
R-value measures thermal resistance — how effectively a material slows the transfer of heat. Higher R-value = better insulation. But here’s something most homeowners don’t realize: R-value is measured under standardized laboratory conditions that don’t fully account for the intense radiant heat dynamics of a Southern California attic.
Real-world performance in high-solar climates can differ from laboratory ratings. The effective R-value of conventional insulation decreases somewhat as temperature differentials increase — meaning your R-38 fiberglass batts may perform closer to R-30 on a 110°F Inland Empire afternoon. This is one reason building scientists in the region often recommend targeting the upper end of code requirements (R-49 or even R-60 in particularly hot zones like Palm Springs, Victorville, or the San Fernando Valley).
The California Climate Zone system divides the state into 16 distinct zones, each with specific insulation requirements. Southern California homeowners should check which zone their property falls in:
- Climate Zones 6-9 (Coastal LA, San Diego): Minimum R-38 attic floor insulation
- Climate Zones 10-13 (Inland Empire, San Gabriel Valley, Sacramento-adjacent): Minimum R-49 recommended
- Climate Zone 15 (Desert communities — Palm Springs, Coachella Valley): R-49 to R-60, with radiant barrier strongly advised
Radiant Barriers: The SoCal Secret Weapon
If you only make one upgrade to a Southern California attic, many energy consultants would argue it should be a radiant barrier — particularly in inland and desert communities. Here’s why they’re such a game-changer in our climate.
Conventional insulation resists conducted and convected heat. But a large portion of the heat entering your attic arrives via radiation — electromagnetic energy traveling directly from the hot roof deck through the air. Radiant barriers work differently: they reflect this radiant energy rather than absorbing it. A properly installed radiant barrier (typically a thin sheet or coating of highly reflective aluminum) on the underside of the roof rafters can reflect up to 97 percent of incoming radiant heat.
The Florida Solar Energy Center, one of the leading research institutions on radiant barriers, has documented cooling cost reductions of 8 to 12 percent in warm climates from radiant barrier installation alone. In Southern California’s most intense climate zones, combined with adequate bulk insulation, total cooling savings can reach 15 to 25 percent. The California Energy Commission has included radiant barriers in the Title 24 compliance pathways since 2019, and in 2025 updated its prescriptive tables to make radiant barriers a default recommendation for Climate Zones 10 through 15.
There are two primary installation methods:
- Foil-faced insulation: Radiant barrier integrated into sheathing or insulation board, installed during roof construction or re-roofing
- Draped or stapled foil: Perforated aluminum foil stapled to the underside of roof rafters — the most common retrofit method
Pro Tip: Make sure the radiant barrier faces a minimum ¾-inch air space. Radiant barriers only work across an air gap — without it, they lose most of their effectiveness. Also choose a perforated product to allow moisture to pass through and prevent condensation issues in coastal microclimates.
Insulation Methods Compared
| Insulation Type | R-Value per Inch | Typical Cost (per sq ft) | Best For | SoCal Suitability |
|---|---|---|---|---|
| Blown-In Cellulose | R-3.2 – R-3.8 | $1.20 – $2.00 | Retrofit attic floors | ⭐⭐⭐⭐ |
| Blown-In Fiberglass | R-2.2 – R-2.7 | $1.00 – $1.80 | Coastal moisture areas | ⭐⭐⭐⭐ |
| Closed-Cell Spray Foam | R-6.0 – R-7.0 | $3.50 – $6.50 | Roof deck / duct protection | ⭐⭐⭐⭐⭐ |
| Radiant Barrier Foil | N/A (reflective) | $0.15 – $0.50 | Inland / desert climates | ⭐⭐⭐⭐⭐ |
| Rigid Polyiso Board | R-6.0 – R-6.5 | $2.00 – $4.00 | Re-roofing projects | ⭐⭐⭐ |
Real Homeowner Stories: Before and After
Case Study 1: Pasadena Ranch Home — The Radiant Barrier + Blown-In Combination
Maria and David T. purchased a 1,950-square-foot ranch-style home in Pasadena in 2022. The house, built in 1968, had approximately 4 inches of old compressed fiberglass batts in the attic — effectively performing at around R-8 due to age and settling. Their summer electricity bills averaged $340 per month, and their second-floor bedrooms were routinely 6 to 8 degrees warmer than the thermostat setting.
In the spring of 2025, they contracted a local energy efficiency company to perform a complete attic upgrade. The project included: removing the old degraded insulation, air sealing around 23 identified penetrations and bypasses, installing a perforated radiant barrier on the rafter undersides, and blowing in R-49 cellulose insulation on the attic floor. Total project cost: $4,800, after applying a $1,200 Southern California Edison rebate and a $600 federal 25C tax credit.
The results were striking. By August 2025, their average electricity bill had dropped to $218 per month — a reduction of 36 percent. The temperature differential between their thermostat and upstairs bedrooms dropped to less than 2 degrees. “It’s the single best home improvement investment we’ve made,” David said. “Better than the kitchen remodel.”
Case Study 2: Temecula New Construction — Spray Foam Unvented Attic
A custom home builder in Temecula’s wine country region completed a 2,800-square-foot single-story home in late 2024 using a full spray foam unvented attic system. The builder applied 3 inches of closed-cell spray foam to the entire underside of the roof deck (R-21), bringing the attic into the conditioned envelope and housing all HVAC equipment and ductwork in climate-controlled space.
Energy modeling performed by a certified HERS rater projected annual cooling energy use at approximately 4,200 kWh — compared to a code-minimum vented attic equivalent home at 6,800 kWh. That’s a 38 percent reduction in cooling energy. While the spray foam added roughly $12,000 to the construction cost over conventional methods, the builder was able to right-size the HVAC system (2.5 tons instead of 3.5 tons), saving approximately $4,500 in equipment cost and reducing the payback timeline substantially.
Energy Savings by Insulation Upgrade Type
The following chart illustrates approximate annual cooling energy savings for a typical 1,800-square-foot Southern California home, comparing different upgrade strategies against an uninsulated or minimally insulated baseline.
Annual Cooling Energy Savings (% vs. Baseline)
Source: Estimates derived from California Energy Commission modeling data and Lawrence Berkeley National Laboratory field studies, 2025.
3 Common Challenges and How to Overcome Them
Challenge 1: Old Homes with Asbestos or Degraded Existing Insulation
Southern California has a significant stock of homes built between 1945 and 1980 that may contain asbestos-containing materials — sometimes in the form of vermiculite insulation, but more often in pipe insulation, duct wrap, or ceiling texture. Before any attic work begins in a pre-1985 home, it’s essential to have a certified asbestos inspector evaluate the space.
How to overcome it: Don’t skip the inspection to save $200-$400. If asbestos-containing materials are identified, remediation must be done by a licensed abatement contractor before insulation installation. The cost varies ($500 to $3,000 typically) but is non-negotiable from a health and legal standpoint. In Los Angeles County, the South Coast AQMD maintains a directory of certified contractors. The good news: once remediation is complete, you’re clear to proceed with a full upgrade and can often remove degraded old insulation simultaneously.
Challenge 2: Inadequate Attic Ventilation in Vented Attic Systems
Here’s a counterintuitive challenge: adding more insulation to the attic floor can sometimes make ventilation problems worse. In a properly designed vented attic, airflow moves from soffit vents at the eaves, through the attic space, and out through ridge or gable vents. But many Southern California homes — particularly those that have had additions, re-roofing, or DIY modifications over the decades — have compromised ventilation pathways. Blocking soffit vents with blown-in insulation is one of the most common installation errors.
How to overcome it: Require your contractor to install ventilation baffles (also called rafter dams or insulation baffles) before blowing in insulation. These cardboard or foam channels preserve the airflow path from the soffit to the ridge. Also verify that your home has at least the code-minimum 1/150 ratio of net free ventilation area to attic floor area. If it doesn’t, adding passive vents or a solar-powered attic fan may be part of the upgrade package.
Challenge 3: Attic HVAC Ducts That Undermine Insulation Gains
Up to 30 percent of the cooling energy produced by a typical Southern California air conditioner can be lost through leaky, uninsulated, or poorly insulated duct systems — and most residential ductwork runs directly through the attic. You can install the best insulation money can buy on your attic floor, but if your ducts are leaking conditioned air into 140°F attic space, you’re leaving enormous savings on the table.
How to overcome it: Schedule a duct blaster test or at minimum a visual inspection of all accessible ductwork before completing your attic insulation project. Common problem areas include: flex duct connections at registers and equipment, joints in sheet metal trunk lines, and the air handler itself. Mastic sealant (not standard HVAC tape, which fails over time) should be applied to all leaks. Duct insulation should be upgraded to a minimum R-8 value on supply ducts. In 2026, both Southern California Gas Company and Southern California Edison offer rebates specifically for duct sealing and testing — often $200 to $500 per home.
Cost Breakdown and Incentives in 2026
Let’s talk numbers directly. For a typical 1,500 to 2,200-square-foot Southern California home, here’s what you can realistically expect to pay in 2026 for a comprehensive attic insulation upgrade:
- Air sealing (labor and materials): $300 – $800
- Remove old insulation (if needed): $500 – $1,500
- Blown-in insulation to R-49 (installed): $1,800 – $3,200
- Radiant barrier installation: $400 – $900
- Duct sealing and insulation upgrade: $600 – $1,800
- Total comprehensive upgrade range: $3,600 – $8,200
Now here’s the important part: you don’t have to pay all of this out of pocket. In 2026, several incentive programs stack together meaningfully:
- Federal 25C Energy Efficiency Tax Credit: 30 percent of installed costs for insulation improvements, up to $1,200 per year (extended through 2032 under the Inflation Reduction Act)
- Southern California Edison (SCE) Energy Efficiency Rebates: Up to $250 for attic insulation upgrades meeting R-38 or higher
- SDG&E (San Diego Gas & Electric) Home Energy Upgrade Program: Cash rebates of $300 to $600 for comprehensive air sealing and insulation packages
- Los Angeles County Property Assessed Clean Energy (PACE) Financing: Zero-down financing repaid through property tax assessments — useful for larger spray foam projects
With incentives, many homeowners are seeing net out-of-pocket costs in the $2,500 to $5,000 range for a full attic upgrade — with payback periods of 4 to 8 years based on current SoCal electricity rates (averaging $0.34/kWh for residential customers in 2026 after tiered pricing).
Frequently Asked Questions
How do I know if my current attic insulation is adequate for Southern California?
The simplest check is to go into your attic (safely, on a mild day) and measure the depth of existing insulation between your ceiling joists. If you see less than 10 inches of blown-in material or less than R-30 total, you almost certainly have insufficient coverage for Southern California’s climate demands. A more thorough assessment involves an energy audit by a certified BPI (Building Performance Institute) or RESNET auditor, who will use a blower door test to identify air leakage, assess duct performance, and provide a full thermal performance picture. Many SoCal utilities offer free or subsidized energy audits in 2026 — check with SCE, SDG&E, or SoCalGas before paying out of pocket.
Can I install attic insulation myself, or should I hire a professional?
Blown-in insulation is technically DIY-accessible — big-box stores rent blowing machines when you purchase the required bags of material. However, the air sealing work that should precede insulation installation requires identifying hidden bypasses, working around electrical fixtures safely, and using appropriate sealants for each application type. Most energy experts recommend professional installation for at least the air sealing phase. For radiant barriers, DIY staple-up installation is feasible for reasonably handy homeowners comfortable working in attic conditions. Spray foam should always be professionally installed — improper mixing ratios or application thickness create serious performance and off-gassing issues. When in doubt, get three bids from licensed C-2 (insulation) contractors and ask specifically about their air sealing process.
Will upgrading attic insulation affect my roof or void my roofing warranty?
In the vast majority of cases, attic floor insulation upgrades have absolutely no impact on your roofing system or warranty — you’re working below the roof deck, not above it. Radiant barrier installation (stapled to rafter undersides) also generally has no warranty implications. The one scenario that can affect roofing warranties is spray foam applied directly to the underside of the roof deck, as this creates an unvented attic system. Some roofing manufacturers have specific requirements about ventilation conditions for their warranty terms, so review your current roofing warranty documentation before proceeding with a spray foam roof deck application. A qualified contractor should be able to confirm compatibility or recommend a compliant approach.
Your Cool-Home Roadmap: Turning Knowledge Into Action
You now have the blueprint. Here’s how to turn it into a cooler, more energy-efficient home — step by practical step.
- Step 1 — Assess Your Baseline (This Week): Get into your attic and measure your current insulation depth. Check your last three electricity bills and note your summer cooling averages. If you’re in a pre-1985 home, schedule an asbestos inspection first.
- Step 2 — Schedule a Professional Energy Audit (Within 30 Days): Contact your utility provider about free or subsidized audit programs. A certified auditor will identify your specific air leakage points, duct losses, and insulation gaps — giving you a prioritized upgrade list rather than guesswork.
- Step 3 — Get Competitive Bids (Within 60 Days): Gather at least three quotes from licensed C-2 insulation contractors. Ask each bidder to specifically address air sealing, ventilation baffle installation, and radiant barrier options. Compare scope, not just price.
- Step 4 — Stack Your Incentives (Before Signing a Contract): Visit the DSIRE database (dsireusa.org) and your utility’s rebate portal to identify every applicable incentive. Confirm your contractor is registered with your utility’s rebate program, or rebates may not be processable.
- Step 5 — Schedule Installation for Spring 2026: Avoid summer attic work when possible — for your safety and contractor efficiency. Spring installation means you’ll have full protection in place before peak heat season. After installation, schedule a post-completion energy audit or blower door test to verify performance.
Key Takeaways to Carry Forward:
- Radiant barriers are uniquely effective in Southern California’s high-solar environment and should be part of most inland and desert upgrades
- Air sealing is as important as the insulation material itself — don’t skip it
- HVAC duct performance is a critical co-factor; address ducts alongside attic insulation
- Generous 2026 incentives make comprehensive upgrades more affordable than ever
- Spray foam unvented attic systems deliver premium performance but require professional installation and careful planning
Southern California’s energy landscape is shifting rapidly — electricity rates have climbed 40 percent since 2020 and are projected to continue rising as grid decarbonization accelerates through 2030. A well-insulated home isn’t just more comfortable today; it’s a resilient asset that hedges against rising energy costs and extreme heat events for decades to come.
The question worth sitting with is this: If your attic is currently allowing 35 percent of your cooling energy to escape, how many more summers are you willing to pay for air you’re not actually keeping?

Article reviewed by Pablo Reyes, Wood Flooring Installation & Restoration Expert, on June 8, 2026
