Best Heat-Resistant Flooring: Tile, Polished Concrete, and LVP Compared
Best Heat-Resistant Flooring: Tile, Polished Concrete, and LVP Compared
Reading time: 12 minutes
You’ve just moved into your dream home, and you’re standing in the kitchen wondering why your beautiful vinyl planks near the stove are starting to warp and curl at the edges. Or maybe you’re designing a sunroom in Phoenix, Arizona, where summer floor temperatures can exceed 140°F on a sun-drenched afternoon. Heat-resistant flooring isn’t just a luxury consideration — it’s a practical necessity that directly affects the longevity, safety, and aesthetics of your space.
In 2026, homeowners and interior designers are navigating an increasingly complex flooring market. With global climate patterns pushing average indoor temperatures higher and the growing popularity of radiant floor heating systems (now installed in roughly 32% of new residential builds in the United States, according to the National Floor Covering Association’s 2025 Annual Report), choosing a heat-resistant floor has never been more critical.
So let’s get straight to it: not all floors handle heat equally, and picking the wrong material could cost you thousands in replacements within just a few years. This guide compares three of the most popular heat-resistant options — ceramic/porcelain tile, polished concrete, and luxury vinyl plank (LVP) — across every dimension that matters to real homeowners.
Table of Contents
- Why Heat Resistance Matters More Than Ever in 2026
- Ceramic and Porcelain Tile: The Time-Tested Champion
- Polished Concrete: Industrial Cool Meets Serious Functionality
- Luxury Vinyl Plank (LVP): Modern Marvel with Real Limitations
- Side-by-Side Comparison Table
- Heat Tolerance Visualization
- 3 Common Challenges and How to Overcome Them
- Real-World Case Studies
- Frequently Asked Questions
- Your Heat-Resistant Flooring Decision: Final Roadmap
Why Heat Resistance Matters More Than Ever in 2026
The conversation around heat-resistant flooring has shifted dramatically. Five years ago, homeowners primarily worried about heat damage from dropped pans or fireside radiant zones. Today, three compounding factors have elevated the stakes significantly:
- Climate-driven temperature extremes: The U.S. Climate Data Center reported in early 2026 that average summer indoor temperatures in unconditioned spaces have risen by approximately 4.2°F over the past decade in Sun Belt states.
- Radiant floor heating adoption: Hydronic and electric radiant systems are now a standard feature in luxury builds and retrofits alike, subjecting floors to sustained temperatures between 80°F and 104°F daily.
- Open-plan living layouts: Kitchens and living rooms now share continuous flooring runs, meaning a single flooring material must perform well under cooking heat, fireplace proximity, and high foot traffic simultaneously.
The bottom line? Your flooring material is no longer just a design choice — it’s a thermal engineering decision that will define comfort, maintenance costs, and resale value for the next decade.
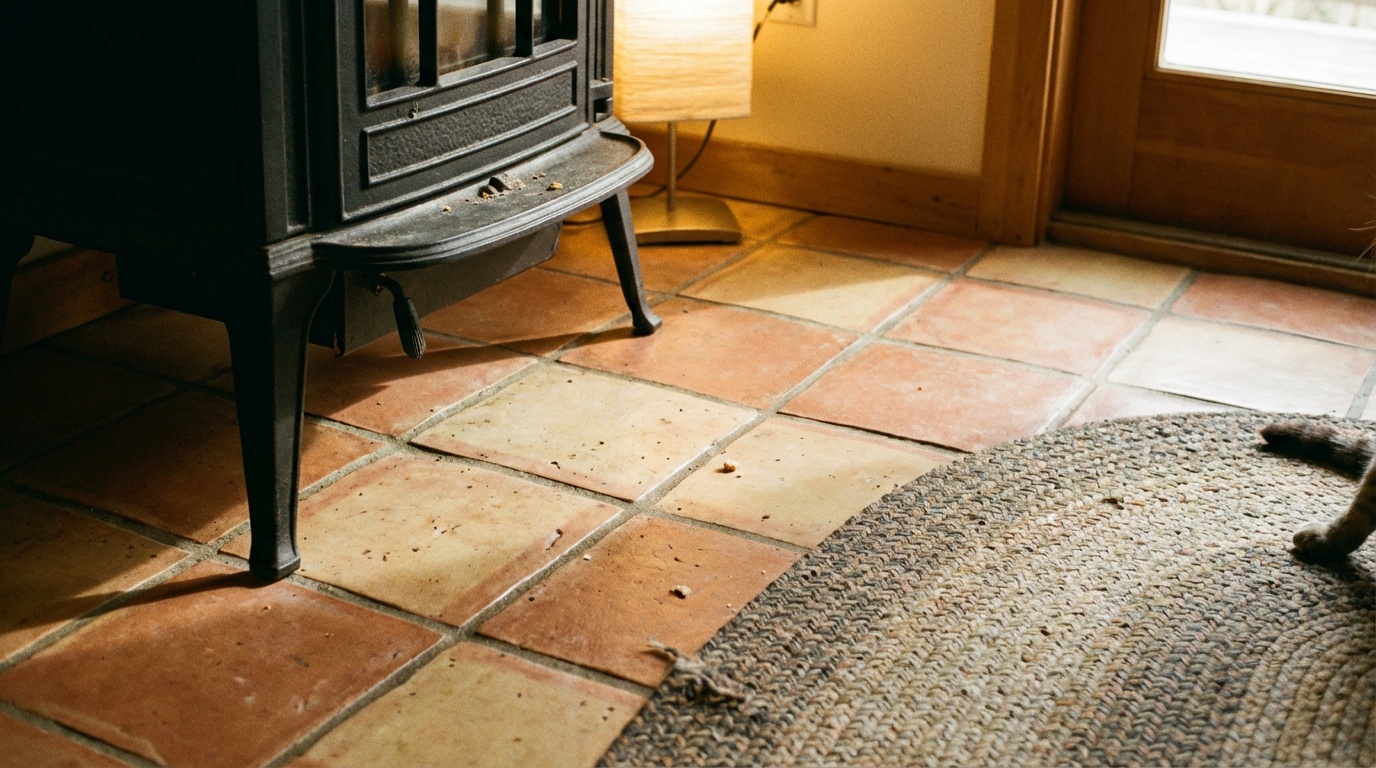
Ceramic and Porcelain Tile: The Time-Tested Champion
If heat resistance were an Olympic sport, ceramic and porcelain tile would own the gold medal — and it wouldn’t even be close. These materials have been used in everything from ancient Roman bathhouses to modern commercial kitchens precisely because they don’t care about temperature the way other materials do.
How Tile Handles Heat
Ceramic tile is fired in kilns at temperatures between 1,800°F and 2,300°F during manufacturing. Porcelain, a denser subcategory, endures even higher firing temperatures — often approaching 2,400°F. This means that by the time tile reaches your kitchen floor, it has already survived conditions far more extreme than anything your oven or fireplace can produce.
Tile’s thermal mass properties also make it an excellent companion for radiant heating systems. Unlike materials that might expand unpredictably, properly installed tile with adequate expansion joints handles the daily thermal cycling of a radiant system with grace. According to the Tile Council of North America (TCNA), porcelain tile rated for radiant heating applications can sustain operating temperatures up to 120°F indefinitely without structural compromise.
Practical Considerations for Tile in 2026
Tile isn’t without its trade-offs, and being transparent about those matters. Here’s what experienced homeowners and contractors consistently point out:
- Hardness and comfort: Standing on tile for extended periods — think a two-hour holiday cooking session — can cause foot and back fatigue. Anti-fatigue mats help but interrupt visual flow.
- Cold feel in non-heated spaces: Without radiant heating underneath, tile can feel uncomfortably cold in winter mornings, especially in northern climates.
- Grout maintenance: Grout lines remain the Achilles’ heel of tile installations. Unsealed grout absorbs grease, stains, and bacteria, requiring periodic resealing — typically every 1-2 years in high-traffic areas.
- Installation complexity: Tile requires a structurally sound, level subfloor. Crack isolation membranes add cost but are essential in many applications.
Best suited for: Kitchens, bathrooms, entryways, sunrooms, spaces with radiant heating, and any area with direct fireplace or appliance heat exposure.
Average cost in 2026: $4–$14 per square foot for materials; $6–$18 per square foot installed, depending on tile size, pattern complexity, and regional labor rates.
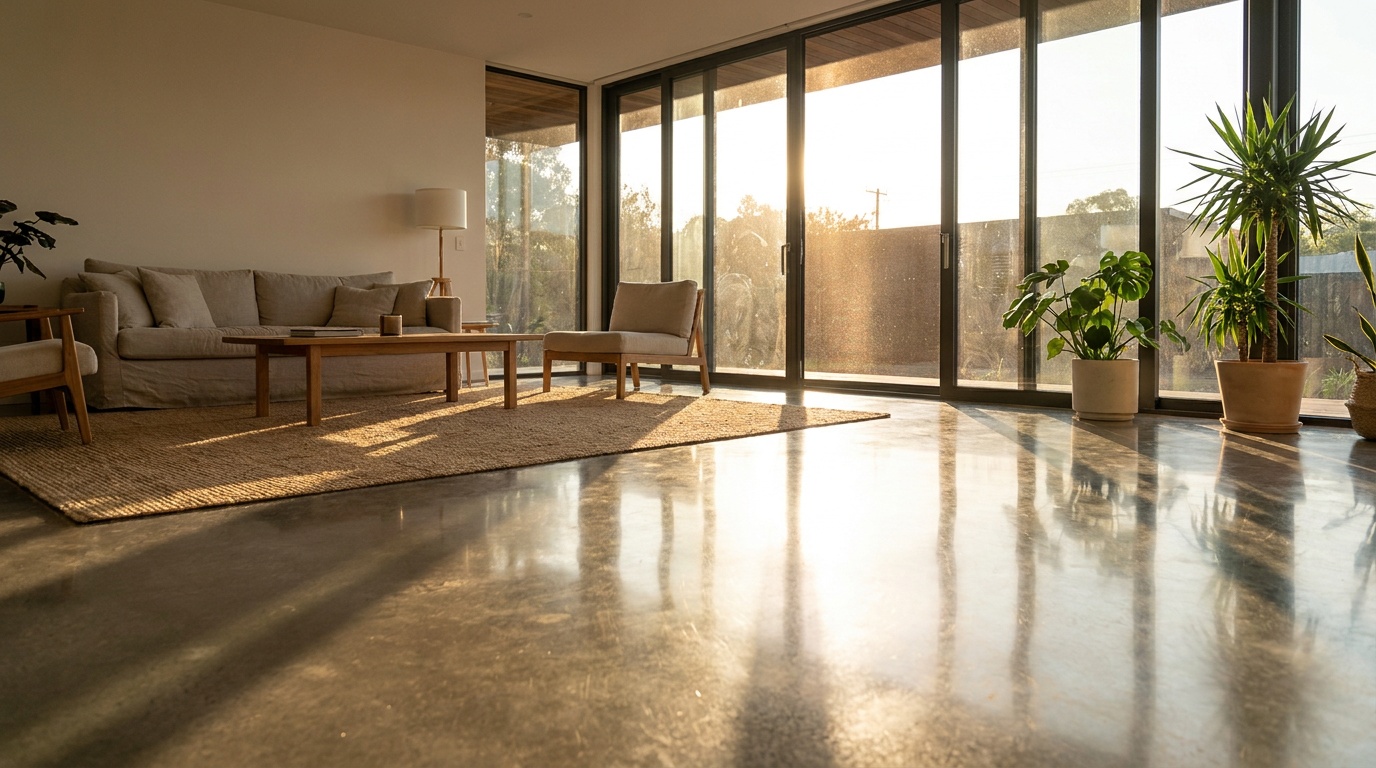
Polished Concrete: Industrial Cool Meets Serious Functionality
Polished concrete has completed a remarkable journey from industrial warehouse floors to the pages of Architectural Digest and high-end residential design. In 2026, it’s one of the fastest-growing flooring choices in new construction, particularly in modern and minimalist home designs. And when it comes to heat resistance, it’s arguably the most capable material on this list.
The Thermal Science Behind Polished Concrete
Concrete is fundamentally a mineral composite — a mixture of cement, aggregate, and water that cures into stone-like density. Its thermal conductivity rating is approximately 0.8–1.3 W/m·K, making it an excellent heat distributor and retainer. For radiant heating applications, polished concrete is often described by HVAC engineers as the “ideal thermal flywheel” — it absorbs heat slowly, stores it efficiently, and releases it evenly over time.
Unlike tile, which sits on top of a subfloor, polished concrete is the floor. The concrete slab itself is ground, honed, and polished to achieve the desired sheen level — from a matte industrial look to a mirror-like Class 4 finish. This monolithic construction means there are no adhesives, backing layers, or glue lines that can degrade under heat stress.
The Real Cost Picture for Polished Concrete
Here’s where honest conversation matters. Polished concrete is frequently presented as a “budget” option because the material itself — the concrete slab — is already there in most slab-on-grade construction. But the reality is more nuanced:
- Grinding and polishing labor: Achieving a high-quality finish requires multiple diamond-grinding passes with progressively finer grits, plus densifier application and final polish. Professional polishing costs between $3–$12 per square foot depending on the desired finish level.
- Crack repair: Existing cracks must be repaired before polishing, adding cost and sometimes aesthetic compromise if visible filler lines remain.
- Sealing requirements: Polished concrete must be sealed and periodically re-treated with a penetrating guard to maintain stain resistance. High-traffic commercial-grade sealers applied in 2026 typically last 3–5 years before maintenance is needed.
- Comfort factor: Like tile, concrete is unforgiving underfoot and acoustically reflective — sound travels readily in spaces with concrete floors, which can be an issue in open plans.
Best suited for: Open-plan modern homes, garages, workshops, basement living areas, spaces with in-slab radiant heating, and commercial-to-residential conversions.
Average cost in 2026: $3–$12 per square foot for polishing existing slab; $8–$20+ per square foot for new decorative concrete installations.
Luxury Vinyl Plank (LVP): Modern Marvel with Real Limitations
Luxury vinyl plank has been the undisputed darling of the flooring world for the past several years, and for good reason. It’s waterproof, durable, relatively affordable, and comes in an astonishing range of visually convincing wood and stone looks. But when the conversation turns to heat resistance, LVP requires a much more careful, honest assessment.
Understanding LVP’s Thermal Threshold
LVP is a PVC-based product, and therein lies both its strength and its limitation. The material is dimensionally stable in a broad range of conditions — but heat is its kryptonite. Most standard LVP products begin to soften and distort at temperatures around 95°F–104°F, with permanent warping potential above 110°F in sustained exposure scenarios.
For context, a kitchen floor surface near a range or oven in direct sunlight can exceed 110°F in summer. Sliding glass doors with south-facing exposure can focus solar heat that regularly pushes floor surface temperatures past 120°F — well beyond LVP’s reliable operating range.
The 2025 revision of the NALFA (North American Laminate Flooring Association) standards for vinyl products introduced more rigorous heat-cycle testing protocols, and as of early 2026, manufacturers are increasingly transparent about thermal performance ratings. Look for products rated to Class 33 commercial or higher with explicit radiant heat compatibility certifications if you’re considering LVP for heated applications.
Where LVP Actually Excels
To be fair — and strategic about your decision — LVP is genuinely excellent in the right contexts:
- Bedrooms and living rooms without direct heat sources benefit enormously from LVP’s comfort underfoot, sound absorption, and ease of installation.
- Basements are perhaps LVP’s strongest use case: cool year-round, moisture-prone, and unlikely to see extreme heat exposure.
- Low-temperature radiant systems (operating below 85°F surface temperature) can be compatible with premium LVP products from manufacturers like Shaw, Mohawk, and COREtec — but always verify compatibility in writing before installation.
- DIY-friendliness: Floating click-lock LVP is among the most forgiving flooring for homeowners to self-install, significantly reducing labor costs.
Average cost in 2026: $2–$7 per square foot for materials; $4–$9 per square foot installed. Premium heat-rated products command $6–$10 per square foot for materials alone.
Side-by-Side Comparison Table
| Metric | Ceramic/Porcelain Tile | Polished Concrete | Luxury Vinyl Plank (LVP) |
|---|---|---|---|
| Max Sustained Heat Tolerance | 120°F+ (radiant rated) | Virtually unlimited | 95°F–110°F |
| Radiant Heating Compatible | ✅ Excellent | ✅ Best option | ⚠️ Limited/check specs |
| 2026 Installed Cost (avg/sq ft) | $6–$18 | $8–$20 | $4–$9 |
| DIY Installation Ease | Moderate–Difficult | Difficult (professional) | Easy–Moderate |
| Lifespan (typical) | 25–50+ years | 50–100+ years | 10–25 years |
Heat Tolerance Visualization
The chart below illustrates the relative heat tolerance performance scores of each flooring type across four key heat-exposure scenarios, rated on a scale of 0–100.
Heat Performance Score (0–100 scale)
3 Common Challenges and How to Overcome Them
Challenge 1: Choosing Flooring That Works with Your Existing Radiant System
Many homeowners discover their radiant heating system after buying a home, then face the challenge of choosing compatible flooring. The most common mistake is assuming any flooring marked “radiant heat compatible” meets the same standard — it doesn’t.
Solution: Request your radiant system’s operating temperature range from the installer or property records. For hydronic systems, this is typically the water temperature range (e.g., 90°F–120°F). For electric systems, check the thermostat programming. Match this to manufacturer specifications — not just marketing language — for your chosen flooring. For radiant systems operating above 90°F surface temperatures, tile or polished concrete are the only truly reliable choices.
Challenge 2: Managing Heat-Driven Expansion and Contraction
Every flooring material expands and contracts with temperature fluctuations — but the magnitude differs dramatically. LVP can expand up to 3/8 inch per 10 linear feet with significant temperature swings, which is why expansion gaps at walls and thresholds are non-negotiable. Tile with inadequate expansion joints cracks. Even polished concrete develops micro-cracks if thermal cycling isn’t accounted for in the slab design.
Solution: Always install flooring according to the manufacturer’s acclimation guidelines (most products require 48–72 hours of on-site acclimation before installation). For tile, use the TCNA’s EJ171 expansion joint guidelines. For LVP in large rooms or areas with dramatic seasonal temperature swings, use T-moldings every 30–40 linear feet to accommodate movement.
Challenge 3: Balancing Heat Resistance with Comfort and Aesthetics
The most heat-resistant options — tile and polished concrete — are also the hardest, coldest, and most acoustically challenging materials. Many homeowners fall in love with polished concrete’s aesthetic in a showroom, then struggle with it in daily living after installation.
Solution: Layer thoughtfully. Area rugs over polished concrete or tile break up acoustic reflectivity, add warmth, and cushion hard surfaces without compromising the floor’s heat performance. Anti-fatigue mats in kitchen zones are a practical necessity for tile and concrete. For the coldest months, radiant heating turns these hard surfaces into a luxury — the thermal mass actually becomes an advantage, as the floor holds heat longer between heating cycles.
Real-World Case Studies
Case Study 1: The Phoenix Sunroom Renovation (2025)
A homeowner in Scottsdale, Arizona undertook a sunroom expansion project completed in late 2025. The room featured 180 square feet of south-facing windows and regularly saw floor surface temperatures exceeding 125°F during peak summer afternoons. The original LVP — installed just three years prior — had developed significant edge warping and three visible buckle points near the glass walls.
The replacement choice was 24″×24″ large-format porcelain tile in a light sand colorway, installed with crack isolation membrane and proper perimeter expansion joints. By summer 2026, the homeowners reported zero heat-related issues and noted that the tile’s higher solar reflectance actually reduced the room’s ambient temperature by an estimated 4°F compared to the darker LVP it replaced.
Key takeaway: In high-solar-gain spaces, tile color selection matters as much as material choice — lighter tiles reflect more radiant energy than they absorb.
Case Study 2: The Chicago Mixed-Use Basement Conversion
A residential renovation in Chicago’s Lincoln Park neighborhood converted a 1,200-square-foot basement into a combined home gym, home office, and media room in early 2026. The homeowner originally planned LVP throughout for cost efficiency and DIY installation. However, the gym zone required rubber flooring over the concrete, and the home office incorporated electric radiant heating.
The final solution was a hybrid approach: polished concrete (honed finish, Class 2) in the gym zone beneath rubber interlocking tiles, premium radiant-rated LVP in the media room (where no direct heat sources existed), and heated polished concrete in the office. Total project cost came in 12% under initial budget because the concrete polishing eliminated the need for subfloor preparation that LVP would have required.
Key takeaway: Mixed-use spaces often benefit most from a zoned flooring strategy that assigns each material to its ideal application rather than forcing one material to perform across incompatible conditions.
Frequently Asked Questions
Can I use LVP in my kitchen if I’m careful about heat sources?
Yes, but with intentional precautions. Keep LVP at least 12 inches from range and oven bases where floor-level heat can radiate during extended cooking sessions. Use appliance mats beneath stoves and dishwashers. Avoid LVP in front of south or west-facing sliding doors unless window film or exterior shading controls solar heat gain. Premium LVP products rated at Class 33 or higher with explicit high-temperature credentials provide more margin — but tile remains the superior kitchen choice for heat-intensive cooks.
Is polished concrete too cold and hard for everyday family living?
Cold and hard — yes, but both challenges are very manageable. Pairing polished concrete with an in-slab or under-slab radiant heating system eliminates the cold-underfoot problem entirely and actually makes concrete the most comfortable radiant flooring available, since the thermal mass sustains warmth longer between heating cycles. The hardness concern is best addressed with strategic area rug placement in living and bedroom zones, which most design-conscious homeowners do anyway. Families with young children and elderly members are often the biggest polished concrete fans once radiant heat is in the equation.
How do I know if my existing tile installation can handle a new radiant heating system?
The most important factors are the installation method and age. Tile installed with a proper thin-set mortar bed and crack isolation membrane (per current TCNA guidelines) can typically accommodate a retrofit electric radiant mat installed over the existing tile or in a new mortar bed above it. However, tile installed over a wood subfloor without crack isolation is at higher risk of cracking due to differential thermal expansion between the tile assembly and the wood. Before retrofitting radiant heat under existing tile, have a qualified tile contractor assess the current installation’s structural integrity, particularly checking grout joint conditions and any existing cracking patterns as potential indicators of subfloor movement.
Your Heat-Resistant Flooring Decision: A Practical Roadmap
You’ve now got the full picture — the science, the costs, the real-world performance data, and the honest trade-offs. Here’s how to turn that knowledge into a confident decision:
- Map your heat exposure zones first. Walk through your space and identify every potential heat source: range proximity, fireplace radiance, south-facing windows, radiant heating systems, and appliance zones. This thermal map drives every subsequent decision.
- Assign materials to zones, not rooms. The two Chicago basement case study approach works: there’s no rule requiring a single flooring material throughout. Strategic zoning often delivers better performance and value than compromise solutions.
- Get manufacturer documentation in writing. If a flooring salesperson tells you a product is “radiant heat compatible,” ask for the written specification sheet showing the maximum operating temperature. This protects your warranty and your investment.
- Factor in the 10-year total cost, not just installation day. LVP’s lower upfront cost can evaporate quickly if heat damage forces replacement within five years. Polished concrete’s higher installation investment pays dividends across 50+ years of minimal maintenance.
- Consider the comfort layer strategy. If you choose tile or concrete for heat resistance, budget for area rugs and — ideally — radiant heating to transform thermal mass from a challenge into a feature.
As climate patterns continue evolving through the late 2020s and radiant heating becomes standard rather than premium in residential construction, heat-resistant flooring is transitioning from a niche concern to a universal consideration. The homeowners and designers who make proactive material decisions today will avoid the costly retrofits that reactive decision-making produces.
So here’s the question worth sitting with: When you look at your current flooring and imagine your home five summers from now — are you confident it will still look exactly the way it does today? If there’s any doubt, this might be exactly the right moment to act.
Article reviewed by Pablo Reyes, Wood Flooring Installation & Restoration Expert, on May 4, 2026
