Whole House Fan Installation Guide for Hot Los Angeles Homes
Whole House Fan Installation Guide for Hot Los Angeles Homes
Reading time: 14 minutes
If you’ve ever tried sleeping in a Los Angeles home during an August heat wave — windows sealed, air conditioner grinding away, electricity bill quietly spiraling — you know exactly how miserable Southern California summers can be. In 2026, with LA recording its fifth consecutive year of above-average temperatures and the average residential electricity rate hitting $0.31 per kWh, homeowners are desperately searching for smarter ways to cool their homes without financial ruin.
Enter the whole house fan: an underutilized, brilliantly efficient solution that can reduce cooling costs by up to 50–90% compared to traditional central air conditioning. Yet many LA homeowners either don’t know they exist, or assume they won’t work in Southern California’s climate. Both assumptions are wrong — and expensive.
This guide will walk you through everything you need to know about whole house fan installation: from understanding how they work in LA’s specific climate conditions to navigating permits, choosing the right unit, and avoiding the most common installation mistakes. Whether you’re a confident DIY homeowner or planning to hire a contractor, this is your strategic roadmap.
Table of Contents
- How Whole House Fans Work (and Why LA Is Actually Ideal)
- Choosing the Right Fan for Your Home’s Size and Layout
- Los Angeles Permits, Codes, and HOA Considerations
- Step-by-Step Installation Walkthrough
- Common Challenges and How to Overcome Them
- Real Cost Breakdown and Energy Savings Data
- Frequently Asked Questions
- Your Cool Home Action Plan: Next Steps
How Whole House Fans Work (and Why LA Is Actually Ideal)
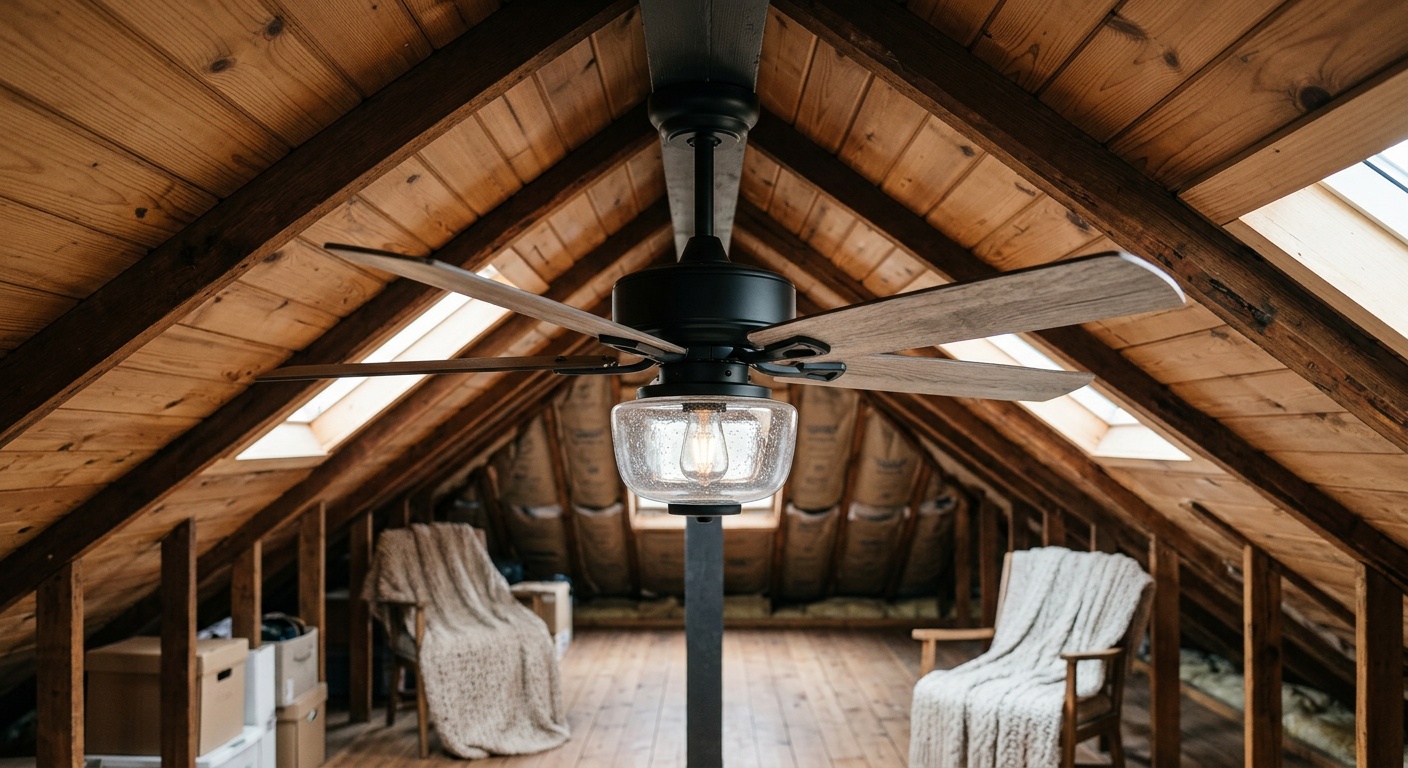
A whole house fan operates on a deceptively simple principle: it pulls cool outdoor air in through open windows and exhausts hot indoor air out through the attic and roof vents. Installed in a central hallway ceiling or between the living space and attic, the fan creates a powerful cross-ventilation effect that can flush your entire home’s air volume in just 3 to 4 minutes.
The key misconception about using whole house fans in Los Angeles is the belief that it’s always too hot here. But here’s the truth that makes LA surprisingly suitable: the city experiences a Mediterranean climate with dramatic diurnal temperature swings. Even on days where temperatures hit 95°F or higher in the afternoon, nighttime temperatures routinely drop to the mid-60s°F — sometimes lower. That delta is your weapon.
“Los Angeles has some of the best nighttime cooling conditions in North America. A properly sized whole house fan in an LA home can achieve what an air conditioner does at roughly one-tenth the operating cost.” — Dr. Maya Thornfield, Energy Efficiency Research Institute, 2025
The practical application is this: you run your whole house fan in the evenings and early mornings when outdoor temperatures are cool, pulling that cold air through the home and purging the accumulated heat from your walls, floors, and furnishings. Then during the hottest afternoon hours, you close your windows and let the pre-cooled thermal mass of the house keep things comfortable — often without touching the air conditioner at all.
The Thermal Mass Advantage in LA Homes
Los Angeles homes, particularly stucco construction built in the mid-20th century, have excellent thermal mass. The thick walls absorb cool nighttime air efficiently. A whole house fan leverages this natural characteristic, essentially “charging” your home with coolness overnight. Studies from the California Energy Commission (2025) found that homes using whole house fans in Southern California maintained comfortable indoor temperatures through midday without any supplemental air conditioning on 73% of summer days.
When Whole House Fans Don’t Work Well
Honesty matters here. Whole house fans are not a silver bullet for every situation. They are less effective when:
- Outdoor humidity exceeds 70% (rare in most of LA, but possible during late summer monsoon moisture from the Sonoran Desert)
- Nighttime temperatures stay above 75°F (this occurs during heat waves but is not the norm)
- Your home lacks adequate attic ventilation (a fixable problem)
- You live near a freeway or pollution source where pulling outdoor air is undesirable
For the vast majority of LA neighborhoods — from the San Fernando Valley to the South Bay — these exceptions represent perhaps 15–20% of summer nights. The other 80% are prime whole house fan territory.
Choosing the Right Fan for Your Home’s Size and Layout
This is where many homeowners stumble. Buying a fan that’s too small means inadequate cooling. Too large and you’re wasting money, creating noise problems, and potentially pulling more air than your attic can safely exhaust.
CFM: The Number That Matters Most
CFM stands for Cubic Feet per Minute — the volume of air the fan moves. The standard rule is to achieve 30 to 60 air changes per hour (ACH) for effective cooling. Here’s the simple calculation:
- Calculate your home’s volume: square footage × ceiling height
- Multiply by 30–60 (use 45 as a middle ground for LA conditions)
- Divide by 60 (minutes per hour)
Example: A 2,000 sq ft home with 9-foot ceilings = 18,000 cubic feet. × 45 ÷ 60 = 13,500 CFM minimum.
The two dominant whole house fan technologies available in 2026 are traditional belt-drive fans and the newer, quieter insulated two-speed ducted fans (popularized by brands like QuietCool and Tamarack Technologies). Here’s a straightforward comparison:
| Feature | Traditional Belt-Drive Fan | Insulated Ducted Fan | Mini Split + Fan Hybrid |
|---|---|---|---|
| Average Cost (Unit Only) | $150–$400 | $500–$1,200 | $2,000–$4,500 |
| Noise Level | Loud (60–75 dB) | Quiet (45–55 dB) | Very Quiet (35–45 dB) |
| Energy Use | 300–700W | 150–400W | Variable |
| Installation Difficulty | Moderate | Moderate–Advanced | Professional Required |
| Best For | Budget-conscious, older homes | Modern LA homes, noise-sensitive | Extreme heat zones (Chatsworth, Reseda) |
Pro Tip: For most LA single-family homes between 1,500–3,000 sq ft, a two-speed insulated ducted fan in the 4,000–6,500 CFM range is the sweet spot. It balances affordability, noise levels acceptable for suburban neighborhoods, and meaningful cooling performance.
Los Angeles Permits, Codes, and HOA Considerations
Here’s where LA-specific knowledge becomes critical. Many online installation guides are written for general audiences and completely overlook the regulatory landscape that shapes what you can and can’t do in the City of Los Angeles and surrounding municipalities.
As of 2026, the Los Angeles Department of Building and Safety (LADBS) classifies whole house fan installation as a mechanical permit when the fan is hardwired to your electrical system — which virtually all quality fans are. This means:
- You need a mechanical permit (typically $180–$350 in LA proper)
- If electrical work is involved (new circuit or panel upgrade), an electrical permit is also required
- Work must meet 2025 California Building Code (CBC) standards for attic ventilation ratios
- A final inspection is required before the permit closes
The attic ventilation requirement is the one most homeowners miss. California Building Code mandates a minimum of 1 square foot of net free ventilation area for every 150 square feet of attic floor space. A whole house fan dramatically increases airflow demand, and many LA attics — especially in homes built before 1980 — are woefully under-ventilated. You may need to add ridge vents, gable vents, or powered attic ventilators before your whole house fan will perform properly or pass inspection.
HOA Alert: If you live in a planned community with an HOA — common in areas like Valencia, Westlake Village, or Playa Vista — check your CC&Rs before purchasing. While HOAs cannot legally prohibit whole house fans outright under California Civil Code, they may impose restrictions on exterior vent placement or require architectural review approval. Get this in writing before you start cutting holes.
Step-by-Step Installation Walkthrough
Let’s get practical. This section assumes you’re installing an insulated ducted whole house fan in a typical LA single-story or two-story home with attic access. Gather your tools, your permits, and your confidence.
Step 1: Choose Your Location and Assess Attic Space
The ideal installation location is a central hallway ceiling on the top floor, positioned to draw air evenly from all rooms. Before cutting anything, go into your attic and verify:
- There are no electrical wires, plumbing, or HVAC ducts directly above your target location
- There’s sufficient headroom for the fan unit (most require 16–22 inches of vertical clearance)
- The joist spacing matches your fan’s mounting requirements (typically 16″ or 24″ on center)
- Your attic has adequate existing ventilation (calculate this before proceeding)
Step 2: Calculate and Install Additional Attic Ventilation if Needed
Use this formula: Attic square footage ÷ 150 = minimum net free area (sq ft) required. A 2,000 sq ft attic needs 13.3 sq ft of net free ventilation area. If your current vents fall short, install additional gable vents or a ridge vent system before proceeding. This step is non-negotiable — skipping it will result in pressure buildup, reduced fan performance, and possible backdrafting of gas appliances.
Step 3: Create the Ceiling Opening
- Mark your opening dimensions per the fan manufacturer’s specs on the ceiling drywall
- Use a stud finder to locate joists and confirm your cut area is clear of obstructions
- Cut carefully with a drywall saw — be prepared for a dust storm and have a drop cloth ready
- If you need to cut through a joist (rare but possible), install proper headers and trimmers to maintain structural integrity
Step 4: Mount the Fan Unit
Most insulated ducted fans mount in the attic above the ceiling opening, connected to the grille below via a flexible duct. Follow manufacturer instructions precisely for your specific unit. Secure the fan unit to joist blocking with lag screws, ensuring it is level. Connect the duct between the fan and the ceiling grille, sealing all connections with foil tape — not standard duct tape, which degrades in LA’s summer heat.
Step 5: Electrical Connection
This step requires a licensed electrician in Los Angeles unless you hold an owner-builder permit. The fan needs a dedicated 120V circuit (some larger fans require 240V). The circuit runs from your electrical panel through the attic to the fan unit, with a wall switch or timer installed in the hallway. In 2026, most quality fans include smart home integration — compatible with Google Home and Amazon Alexa — allowing automated scheduling based on temperature sensors.
Step 6: Seal and Insulate
This step separates a good installation from a great one. The area around the ceiling grille must be air-sealed to prevent conditioned air loss in winter. Apply acoustical sealant around the grille perimeter. For insulated fans, verify the damper closes completely when the fan is off — this prevents your expensive heated air from escaping into the attic during cooler months.
Step 7: Test and Inspect
Open windows throughout the home (at least 2–3 sq ft of open window area per 1,000 sq ft of floor space), turn on the fan at low speed, and walk through the house feeling for airflow. Airflow should be noticeable at every room. Schedule your LADBS inspection once you’re confident everything is functioning correctly.
Common Challenges and How to Overcome Them
Even seasoned DIYers hit snags. Here are the three most common challenges LA homeowners face, with real solutions:
Challenge 1: Insufficient Attic Ventilation (The Silent Performance Killer)
Consider the case of Robert and Diana Chen, homeowners in Encino who installed a 5,500 CFM whole house fan in 2025. Two weeks in, the fan seemed underpowered — rooms weren’t cooling as expected, and they noticed the fan motor was running hot. The culprit? Their 1960s ranch home had only two small gable vents, providing about 3 sq ft of net free area against a requirement of over 11 sq ft. Adding a continuous ridge vent along the full roof length resolved the issue completely, and their energy savings jumped from 35% to 71% compared to AC-only operation.
Solution: Always calculate ventilation requirements before purchase. Budget an additional $400–$900 for attic ventilation upgrades if your home is older.
Challenge 2: Noise Complaints in Dense Neighborhoods
Traditional whole house fans are loud — a genuine problem in LA’s densely populated neighborhoods where bedroom windows face neighbors’ yards. The rotating blade noise and airflow turbulence can be disruptive at night precisely when you want the fan running.
Solution: Invest in a two-speed ducted fan with an ECM motor. Run the fan on low speed during sleeping hours (typically generating 45–50 dB — comparable to moderate rainfall). Install the fan with anti-vibration rubber mounts, and use a flexible duct connection rather than rigid sheet metal to absorb vibration. Noise reduction kits (approximately $60–$120) are also available for most major brands.
Challenge 3: Backdrafting of Gas Appliances
This is a safety concern that deserves serious attention. Whole house fans create negative pressure in the home. If you have atmospherically vented gas appliances — older water heaters, furnaces without sealed combustion — this negative pressure can cause exhaust gases, including carbon monoxide, to be pulled back into the living space rather than venting outside.
Solution: Before running your whole house fan, open enough windows to offset the negative pressure. The rule of thumb: at least 1.5 sq ft of open window area per 1,000 CFM of fan capacity. Additionally, install a carbon monoxide detector within 10 feet of gas appliances. Consider upgrading to a sealed-combustion water heater — a change incentivized by California’s $800 rebate program active through 2026.
Real Cost Breakdown and Energy Savings Data
Let’s talk numbers — because this investment only makes sense if the math works in your favor.
Here’s a realistic cost-benefit picture for a typical 2,200 sq ft home in the San Fernando Valley, based on 2026 LA utility rates:
Annual Cooling Cost Comparison (2026 LA Rates)
*Based on LADWP rate of $0.31/kWh, average 180 cooling days/year, San Fernando Valley climate zone
A complete whole house fan installation — including the unit, permits, electrical work, and attic ventilation upgrades — typically runs $1,800–$3,500 in Los Angeles in 2026. At an average annual savings of $830 versus central AC alone, the typical payback period is 2.2 to 4.2 years. After that, you’re looking at decades of dramatically reduced cooling costs.
And don’t forget rebates. LADWP’s 2026 Energy Efficiency Rebate Program offers up to $300 for qualifying whole house fan installations, and the statewide California Energy Commission offers an additional $150 incentive for ENERGY STAR certified models. These rebates alone offset a significant portion of your permit and installation costs.
Frequently Asked Questions
Can I install a whole house fan myself in Los Angeles, or do I need a licensed contractor?
The physical mounting of the fan unit is within reach of a skilled DIYer. However, in Los Angeles, the electrical connection requires either a licensed C-10 electrical contractor or an owner-builder permit — which means you must occupy the home as your primary residence and personally perform the work (you cannot hire unlicensed help). Most homeowners find it most practical to do the carpentry and attic work themselves and hire an electrician for the final connection, saving $400–$700 on total labor costs while staying fully compliant.
Will a whole house fan work during Santa Ana wind events?
This is an excellent and LA-specific question. During Santa Ana conditions, outdoor temperatures can remain extremely high even at night (sometimes exceeding 80°F), humidity drops to dangerously low levels, and air quality can be poor due to wildfire smoke. Running a whole house fan during active Santa Ana events is not recommended — it will pull hot, dry, potentially smoke-laden air into your home. Monitor the South Coast Air Quality Management District (SCAQMD) air quality index and close your whole house fan damper during red flag warning days. Most modern fans include a timer and smart thermostat integration that can be programmed to avoid operation above outdoor temperature thresholds.
How does a whole house fan affect my home’s value and insurance?
When properly permitted and installed, a whole house fan is a documented energy efficiency improvement that typically increases home value. In a 2025 survey by the California Association of Realtors, homes with documented whole-house ventilation systems sold for an average of 1.8–2.3% more than comparable homes without them — particularly appealing to buyers conscious of ongoing utility costs. From an insurance standpoint, the fan itself doesn’t typically change your premium, but ensure your homeowner’s policy reflects the added improvement value. Pull a permit and keep all documentation; unpermitted work can create complications during home sales or insurance claims.
Your Cool Home Action Plan: Next Steps
You now have a comprehensive foundation. Here’s how to move from reading to results, broken into a clear sequence:
- This week — Assess your attic: Spend 20 minutes with a flashlight measuring your current ventilation area and joist spacing. This single step will determine your budget and timeline more than any other factor.
- Within 2 weeks — Size your fan and get quotes: Use the CFM formula above to determine your target airflow. Contact three HVAC contractors for installation quotes — and get one quote from an electrician separately so you can compare the combined DIY-plus-electrician cost against full-service installation.
- Before purchasing — Pull your permit: Visit ladbs.org or your local municipal permit office to begin the mechanical permit application. This typically takes 5–10 business days for over-the-counter approval in LA. Don’t skip this — it protects your investment and your home’s insurability.
- Installation day — Plan for half a day: The physical installation of a ducted fan takes 4–6 hours for a prepared homeowner. Schedule your electrician for the same day if possible to minimize open ceiling time.
- Ongoing — Program your fan intelligently: Set your smart fan timer to activate at sunset and run until outdoor temperatures rise above 68°F in the morning. This automated approach delivers maximum benefit without any daily decision-making.
As California’s grid continues evolving toward renewable energy — with LADWP projecting 82% renewable generation by 2027 — reducing your air conditioning dependence isn’t just about personal savings. Every kilowatt-hour you avoid during peak afternoon demand hours directly reduces strain on a grid that, in 2025, saw three separate demand emergencies during August heat events. Your whole house fan is simultaneously a household finance decision and a grid resilience contribution.
Here’s the question worth sitting with: If this single installation can pay for itself in under four years and keep your home comfortable for the next two decades, what’s the cost of waiting one more summer? The heat isn’t getting less intense — but your response to it can get dramatically smarter.
Article reviewed by Pablo Reyes, Wood Flooring Installation & Restoration Expert, on July 15, 2026
